How to Start a Fire: Step-by-Step Instructions for New Campers (2024)
I’m sure that Everyone knows building a campfire is an essential survival skill that can provide warmth, light, and a means to cook food in the wilderness. However, starting a fire in the wild requires more than just striking a match. Understanding the “fire triangle” is the first step to mastering the art of outdoor fire building.
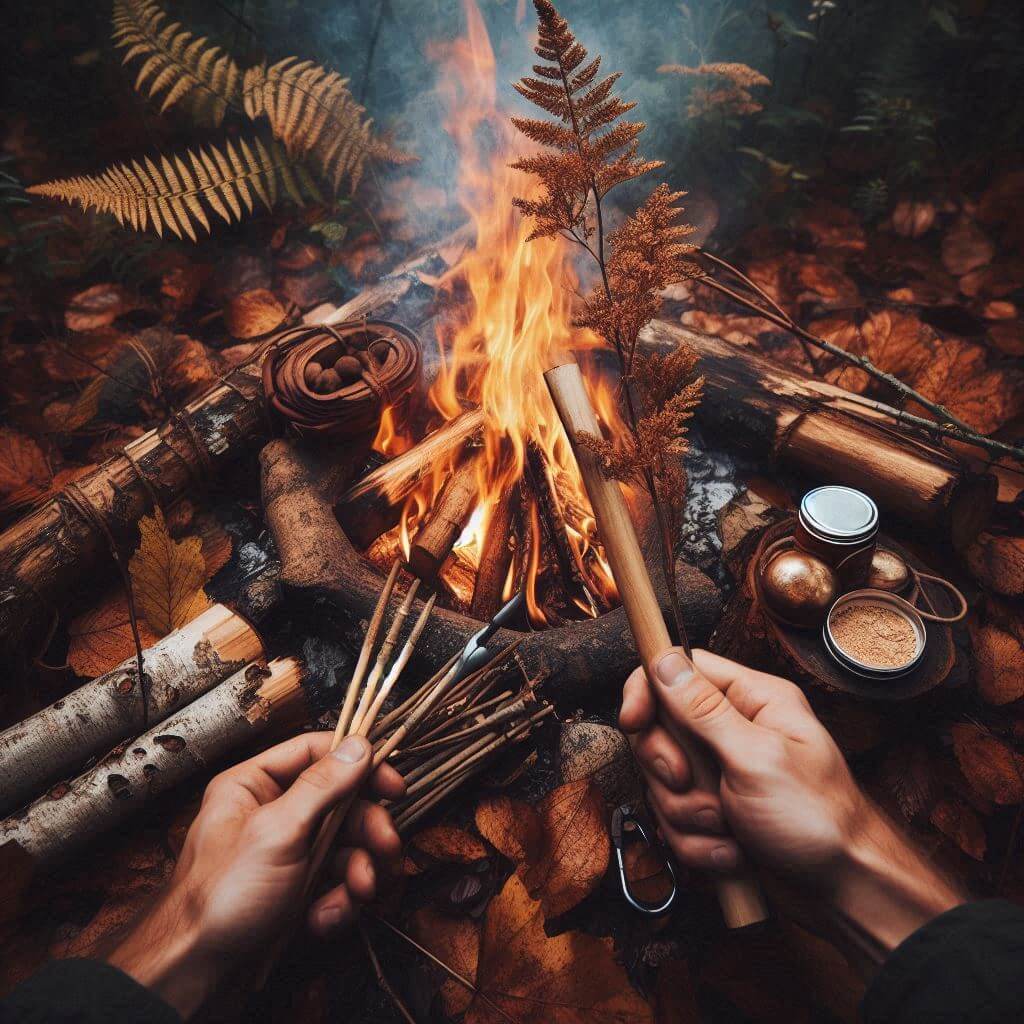
start a fire
The Fire Triangle refers to the three essential elements needed to sustain combustion: fuel, heat, and oxygen. The absence of any one of these elements will prevent a fire from starting or continuing to burn.
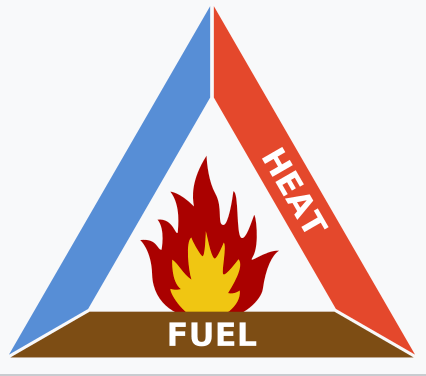
Fire Triangle
Fuel: Fuel is the combustible material that provides the substance for burning. Common fuels include wood, twigs, leaves, dry grass, and charcoal. When selecting fuel, consider its dryness, oil content, and burning characteristics.
Heat: Heat is the energy required to ignite the fuel. Sources of heat can include matches, lighters, sunlight, friction, and electrical sparks.
Oxygen: Oxygen is the oxidizing agent essential for the combustion process. Air contains about 21% oxygen, which is the minimum oxygen concentration needed to sustain burning.
By grasping the fire triangle principle, you’ll be well-equipped to build a campfire in the wild and enjoy the pleasures of outdoor activities. In the following sections, we’ll delve into the step-by-step process of building a fire in the wild, along with safety precautions, transforming you into an outdoor fire-building expert. Well, no need to worry, this guide is your trusty roadmap to igniting your first campfire. We’ll cover practical, no-nonsense methods that even your dog could follow (well, almost).
Understanding the Basics
Safety First: Before we dive into lighting things up, let’s talk safety. You don’t want your campfire to turn into a wildfire, right? You should always check things below before you light a fire:
Check for fire restrictions or bans. Local authorities may have restrictions in place depending on the time of year and weather conditions.
Choose a safe location. If designated fire pits are unavailable, look for existing clearings in the area. These open areas should be at least 15 feet away from flammable materials like trees, tents, and dry vegetation. Avoid building fires on slopes, under tree roots, or in windy areas. (To be clear, if you need to send a distress signal, a fire under tree roots can create smoke that is more visible from a distance. However, ensure the fire is controlled and there are no flammable materials nearby.) Clear the area around the fire pit of debris and dig a pit if necessary. Prioritize fire safety to ensure a responsible and enjoyable outdoor experience.
Have a water source nearby. Keep a bucket of water or a hose close at hand in case the fire needs to be extinguished quickly.
Tools and Materials Needed
Basic Tools: The essentials are matches, lighters, or a flint and steel kit. Keep these in a waterproof container because nothing says “frustrating” like trying to strike wet matches. We will get into these tools later.
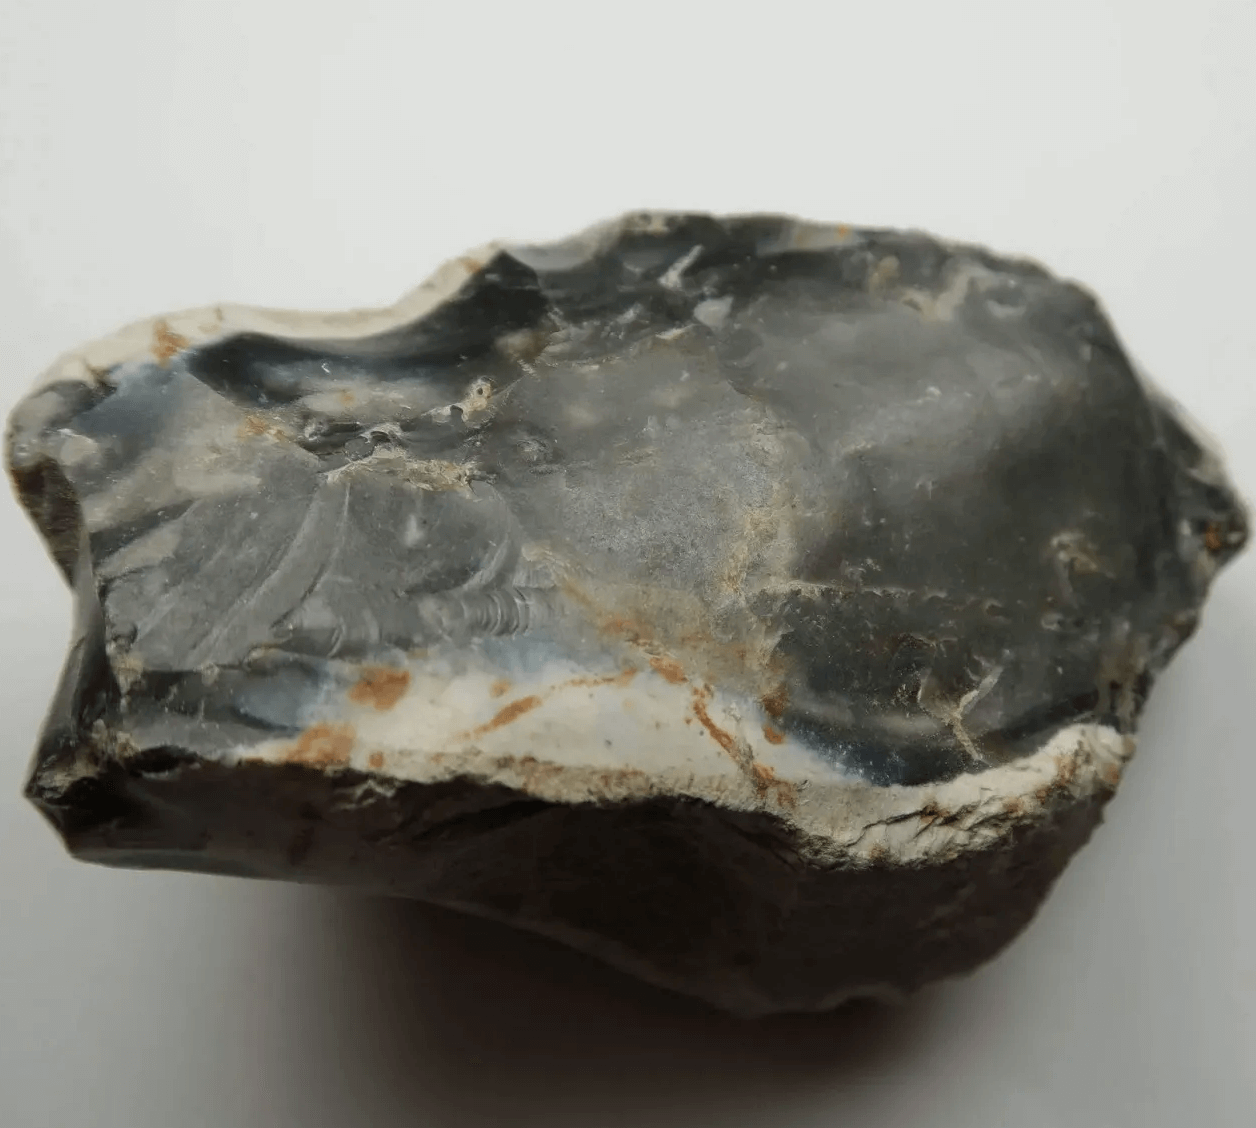
flint
Natural Fire Starters: Nature’s got your back with dry leaves, grass, and pine needles. Just make sure they’re dry—wet stuff is about as helpful as a chocolate teapot.
Man-made Fire Starters: If nature fails you, bring some cotton balls soaked in petroleum jelly. They light up faster than your friend’s face when they realize you brought extra s’mores.
Tinder, Kindling, and Fuel: Think of these as the fire’s three-course meal. Tinder is the appetizer (small and easy to light), kindling is the main course (small sticks that catch fire quickly), and fuel is the dessert (big logs that burn for a long time).
Step-by-Step Fire Starting Methods
Before embarking on your campfire adventure, it’s crucial to assemble the necessary components for a successful and safe fire. Start by collecting tinder, the initial fuel that will ignite easily. Dry leaves, bark shavings, or even fine wood shavings can serve as excellent tinder. Next, gather kindling, which consists of small sticks or twigs about the thickness of a pencil. These will provide a steady flame to sustain the fire until you can add larger logs. Finally, collect fuel wood, comprising larger logs that will maintain the fire’s heat and duration.
Observe the Environment:
Take a moment to assess your surroundings. Pay attention to the wind direction. If it’s windy, consider building your fire in a natural windbreak, such as a rocky outcrop or a grove of trees. This will help protect the flames from being scattered and potentially causing a hazard.
Examine the ground conditions. If the soil is damp or there is snow on the ground, you may need to modify your fire structure. For damp soil, build a flat, platform-style fire by laying a layer of fresh logs on the ground and then covering it with a layer of mud or stones. This will elevate the fire and prevent it from smoldering in the wet ground. In deep snow, consider constructing a raised, suspended platform, also known as a “temple fire.” This will keep the fire off the snow and prevent it from melting and causing the fire to sink.
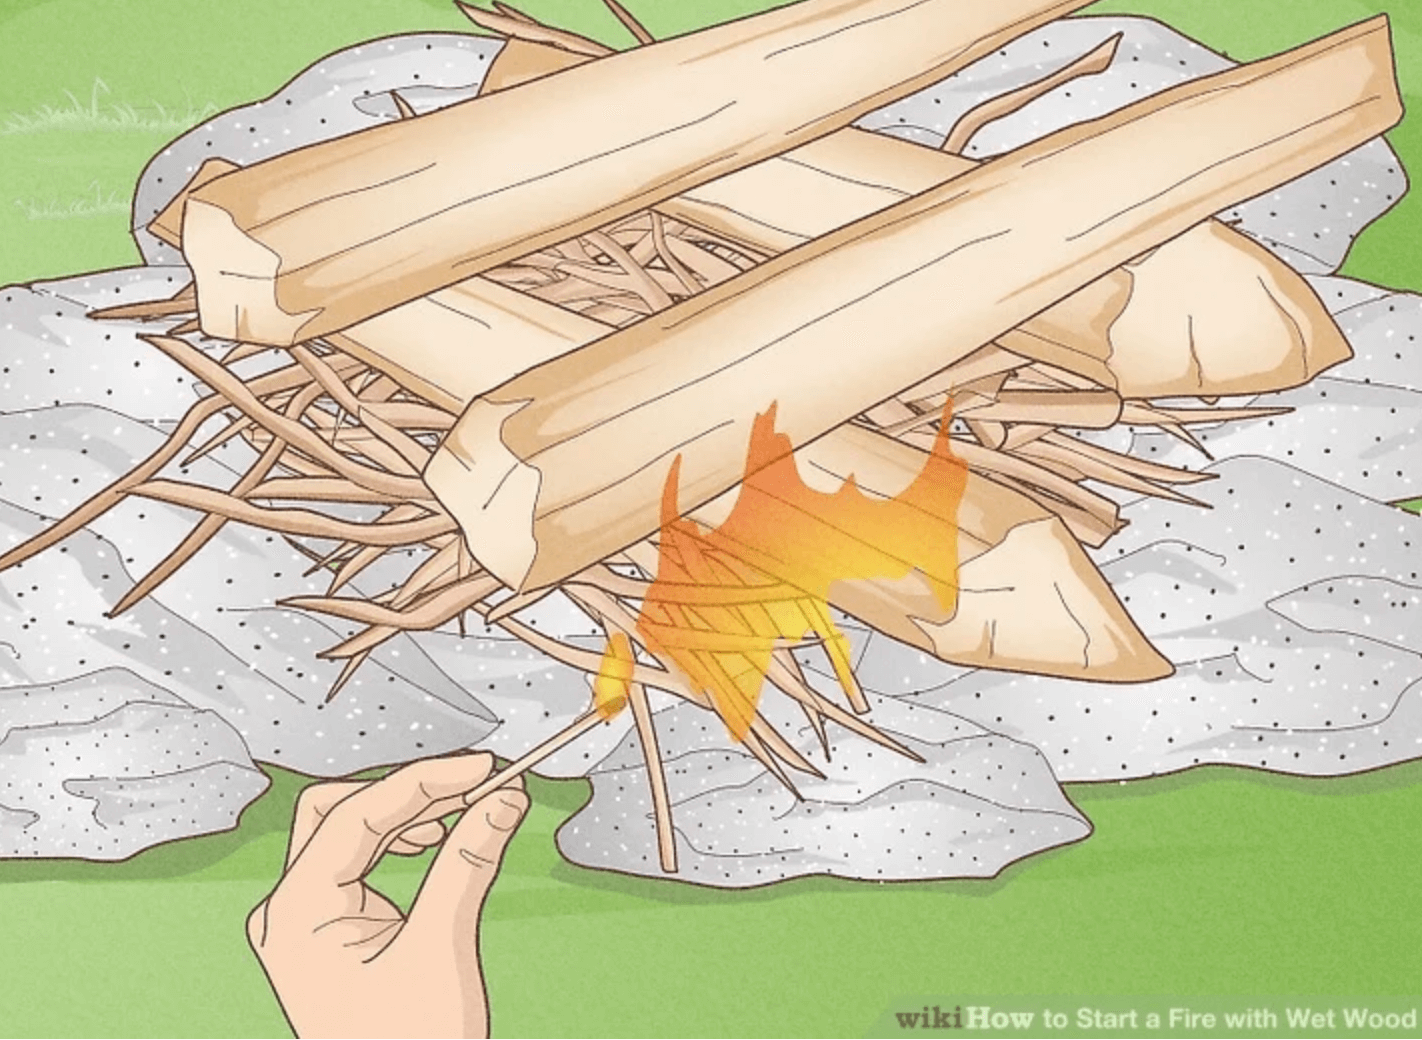
fire-on-wet-ground
Arrange the Tinder:
Create a small, loose nest of tinder in the center of your prepared fire pit. Aim for a structure that resembles a bird’s nest, allowing for air circulation and easy ignition. Birch bark, dry grass, fine wood shavings, bird down, waxed paper, and the fluffy cotton exposed on clothing, are all excellent tinder materials. Hand-crushed fungus can also be ground into powder and used as tinder. Charred cotton and linen, some insects, such as the powdery residue left by wood-boring wasps, and the powdery droppings of birds and bats, as well as rows of feathers dropped by birds in nests, are all very easy to ignite and therefore also suitable as tinder, and even dry vole fur can be used as tinder.
No matter what material is used as tinder, it must be kept dry. If you have a waterproof container that you carry with you, it is a good idea to collect the tinder in it.
Light the Tinder:
Choose your ignition method: matches, a lighter, or a flint and steel. If using matches or a lighter, strike the match or flick the lighter and gently touch the flame to the tinder nest. Be patient and allow the tinder to catch fire gradually. If using a flint and steel, hold the flint at a 45-degree angle and strike it against the steel to create sparks. Aim the sparks at the tinder nest until it ignites. This may require several attempts, so persistence is key.
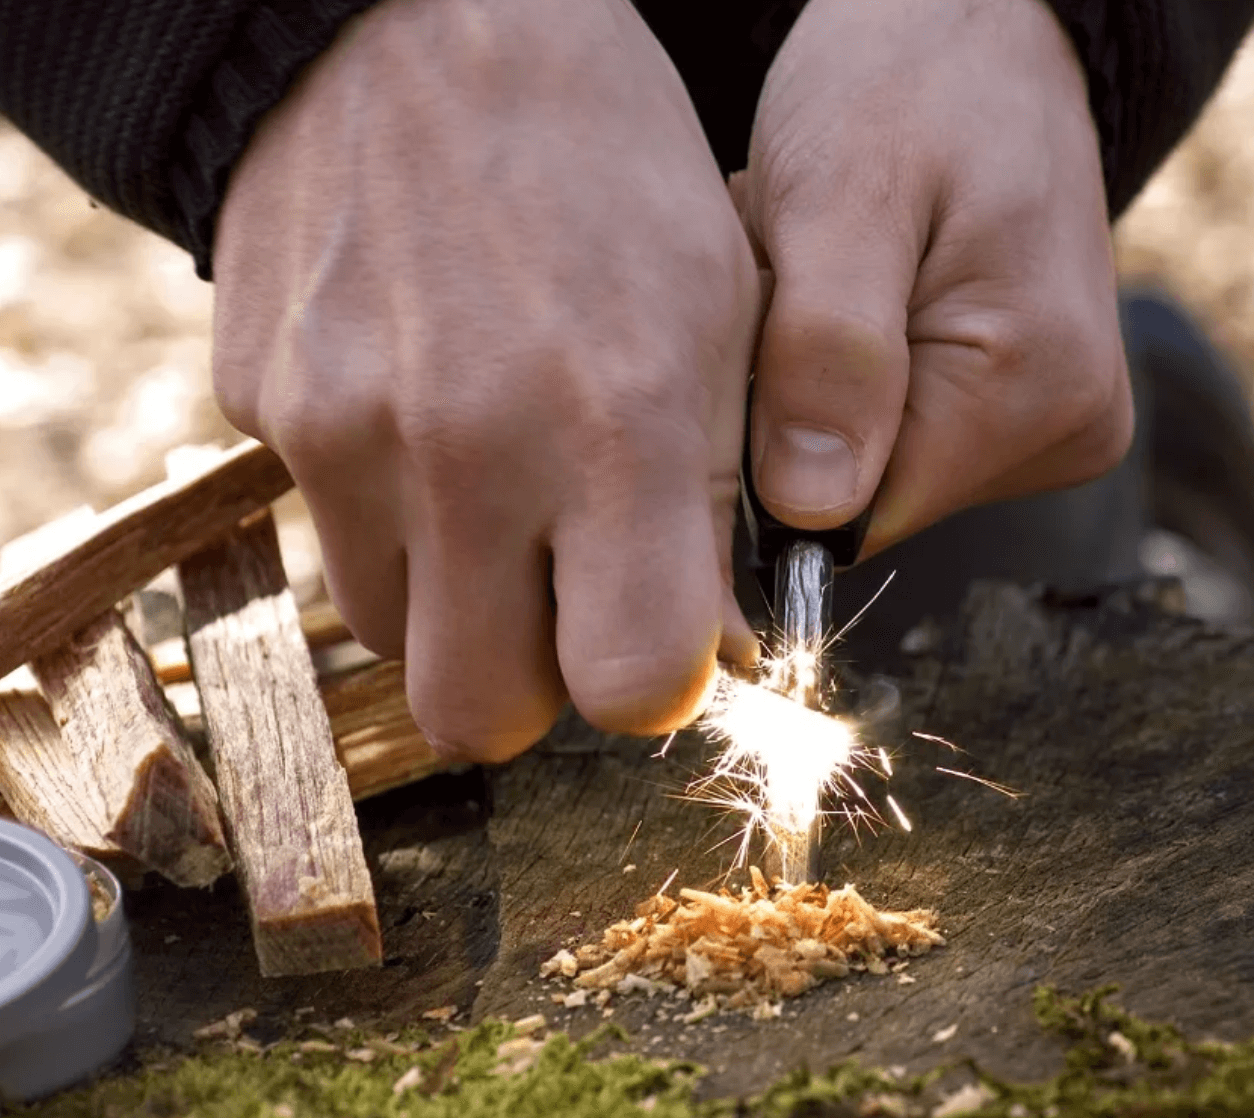
Use of Flint
Build the Fire Gradually:
Once the tinder is burning steadily, begin adding kindling sticks to the fire. Arrange the kindling in a teepee or log cabin structure around the tinder, leaving some air gaps for oxygen flow. As the kindling flames grow, gradually add larger pieces of fuel wood to sustain the fire. Avoid overloading the fire with too much wood at once, as this can smother the flames and create excessive smoke.
Maintain and Control the Fire:
As your campfire grows, monitor its intensity and adjust the fuel wood accordingly. To achieve a steady, long-lasting fire that can burn for an entire night or as long as possible, you should opt for hardwoods as your primary fuel source. Hardwoods are denser and have a higher heat output compared to softwoods, resulting in a slower, more sustained burn.
Here are some of the best hardwood options for long-burning fires:
Oak: Oak is a popular choice for firewood due to its exceptional density, high heat output, and long burning time. It produces a consistent, hot flame with minimal smoke and leaves behind long-lasting embers.
Ash: Ash is another excellent hardwood option for long-burning fires. It burns hot and clean, producing a steady flame and leaving behind a bed of hot coals. Ash is also known for its fast ignition, making it a good choice for starting a fire.
Maple: Maple is a dense hardwood that burns slowly and evenly, providing long-lasting heat. It produces a pleasant aroma and minimal smoke, making it a popular choice for indoor fireplaces.
Hickory: Hickory is a very dense hardwood with an extremely high heat output. It burns slowly and produces a hot, intense flame. Hickory is a great option for those who want a fire that will generate a lot of heat.
Birch: Birch is a hardwood that burns quickly and produces a bright, cheerful flame. It is not as long-lasting as some other hardwoods, but it is a good choice for starting a fire or adding a quick burst of heat.
In addition to using hardwoods, you can also enhance the longevity of your fire by using a combination of different types of wood. For instance, you can start the fire with kindling and softwood, then gradually add larger pieces of hardwood as the fire gets going. This will help to create a fire that burns steadily and consistently for an extended period.
Here are some additional tips for achieving a long-burning fire:
Use seasoned wood: Seasoned wood is wood that has been dried for at least six months to a moisture content of around 20%. Seasoned wood burns more efficiently, produces more heat, and creates less smoke.
Build a proper fire structure: A well-constructed fire structure will help to ensure that the fire burns evenly and efficiently. Consider using a teepee or log cabin arrangement for your fire.
Maintain proper airflow: Airflow is essential for combustion. Make sure your fire has enough airflow to keep it burning steadily. You can adjust the airflow by adding or removing logs as needed.
Avoid overloading the firebox: Don’t overcrowd the firebox with too much wood at once. This can smother the fire and reduce its heat output.
Let the fire burn down naturally: Once you’re ready to go to bed or leave the fire unattended, allow it to burn down naturally. Do not extinguish the fire completely with water, as this can create harmful creosote buildup in your chimney.
Extinguish the Fire Completely
When you’re ready to extinguish the fire, let it burn down completely until only embers and ash remain. Drown the fire with water, ensuring that all embers and hot coals are thoroughly soaked and extinguished. Stir the ashes and embers with a shovel to break up any hidden pockets of heat. Continue adding water until the ashes are cool to the touch.
Troubleshooting Common Problems
Damp Materials: If everything’s wet, look for dry wood under logs or trees. Or, carry some dry tinder in a waterproof bag. Remember, water and fire don’t mix unless you’re putting the fire out.
Wind Issues: Use rocks to create a windbreak around your fire. Wind can be a real buzzkill, but a little strategy can save the day.
Difficulty with Ignition: If the fire just won’t catch, check your materials. They should be dry and easily combustible. If all else fails, channel your inner MacGyver and get creative with what you have.
Encouragement: Don’t get discouraged if it doesn’t work perfectly the first time. Practice makes perfect, and soon you’ll be the go-to fire starter in your group.
By following these comprehensive instructions and safety guidelines, you can build a campfire that provides warmth, light, and a sense of adventure while ensuring the safety of yourself, others, and the surrounding environment. Remember, the key is practice, patience, and always staying safe.